条件によって文字の色を変更
今回はポンコツ2人組がJetpack Composeで変数の値を判定して文字の色を変えるサンプルプログラムに挑戦してみました! このような処理を応用する機会は多いので覚えておきましょう!
MainActivity.kt
Jetpack ComposeはKotlinベースのUIツールです。
条件に基づいてテキストの色を変更する処理も簡単に実装できます。
以下は、変数の値に応じてテキストの色を変えるJetpack Composeのサンプルコードです。
package com.example.sample1

import android.os.Bundle
import androidx.activity.ComponentActivity
import androidx.activity.compose.setContent
import androidx.compose.foundation.background
import androidx.compose.foundation.layout.Arrangement
import androidx.compose.foundation.layout.Column
import androidx.compose.foundation.layout.fillMaxSize
import androidx.compose.material3.MaterialTheme
import androidx.compose.material3.Surface
import androidx.compose.material3.Text
import androidx.compose.runtime.Composable
import androidx.compose.runtime.getValue
import androidx.compose.runtime.mutableStateOf
import androidx.compose.runtime.remember
import androidx.compose.runtime.setValue
import androidx.compose.ui.Modifier
import androidx.compose.ui.graphics.Color
import androidx.compose.ui.text.TextStyle
import androidx.compose.ui.tooling.preview.Preview
import androidx.compose.ui.unit.sp
import com.example.sample1.ui.theme.Sample1Theme

class MainActivity : ComponentActivity() {
    override fun onCreate(savedInstanceState: Bundle?) {
        super.onCreate(savedInstanceState)
        setContent {
            Sample1Theme {
                Surface(
                    modifier = Modifier.fillMaxSize(),
                    color = MaterialTheme.colorScheme.background
                ) {
                    TextColorChanger()
                }
            }
        }
    }
}

@Composable
fun TextColorChanger() {
    // 文字の色を判定するために使用する変数
    var textValue by remember { mutableStateOf("Value1") }

    // 条件によって色を決定
    val textColor = when (textValue) {
        "Value1" -> Color.Red    //赤
        "Value2" -> Color.Blue   //青
        else -> Color.Black      //黒
    }

    // UIを構築
    Column(
        modifier = Modifier
            .fillMaxSize()
            .background(Color.White),
        verticalArrangement = Arrangement.Center
    ) {
        Text(
            text = "Sample Text",
            color = textColor, // テキストの色を設定
            style = TextStyle(fontSize = 24.sp)
        )
    }
}

@Preview
@Composable
fun PreviewTextColorChanger() {
    TextColorChanger()
}
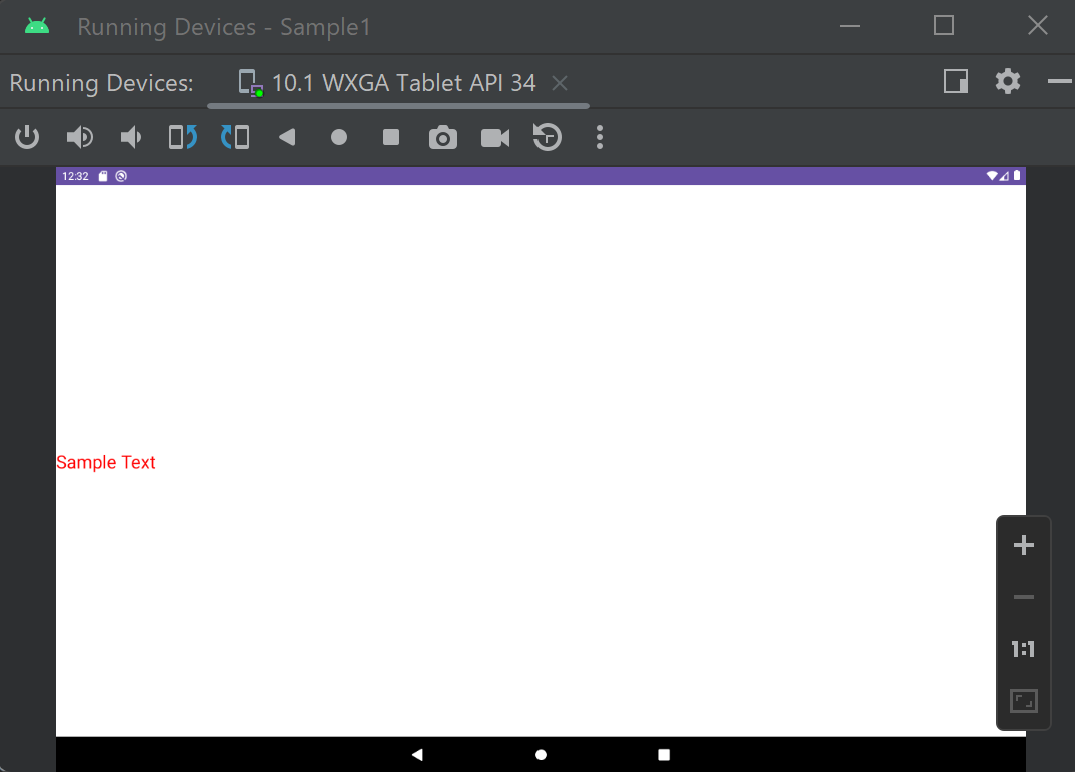
処理結果は次の通りです。

今回のサンプルでは、textValueという変数の値に応じてテキストの色を変更しています。
変数の値が"Value1"なら赤色、"Value2"なら青色、それ以外は黒色で表示されます。
今回のプログラムは理解できましたか?

よく分からなかったという人は mutableStateOf("Value1") の "Value1"を"Value2"に修正して実行してみて下さい。 文字が青色で表示されると思いますがピンときませんか?要するにこの値を判定して文字の色を決めているのです。 この処理は知っておいて損は無いので頑張って勉強しましょうね!
